THE COSMETOLOGY OF BEAUTY
Micro-Link Extensions Installation Montage. (Featuring my fav songs from Beyonce’s Renaissance- No Copyright Infringement Intended.
The New Extensions Wave is Here!
Micro-Links | Braid-less Sew-Ins | Beaded Wefts
Every few years a new hair trend hits the market that is raved about. With many of those trends we neglect to think about the long term effects. For instance, the lace front trend became an international sensation across all ethnic demographics and genders.
The downside to these amazing lace fronts was that eventually the adhesives used to secure them removed the wearer's edges, created allergic reactions causing post-inflammatory hyperpigmentation and eventually became the new baseball hat rather than the gorgeous asset it was supposed to bring to any look.

Loose Curls
Over the last two or three years many fashionistas have been ditching the wigs and opting for a more natural look that combines fullness and length without the hassle of breakage and scalp irritations.
Today's client is opting for the micro-link installation, the sister to the brazilian bond fusion extension. It’s more versatile for styling purposes and allows the client to wash their hair more frequently for a healthier scalp. The plus side is no pain and no breakage. The extension is attached using a silicone bead and a set of mini-players. This style lasts two to three months with proper installation and care.

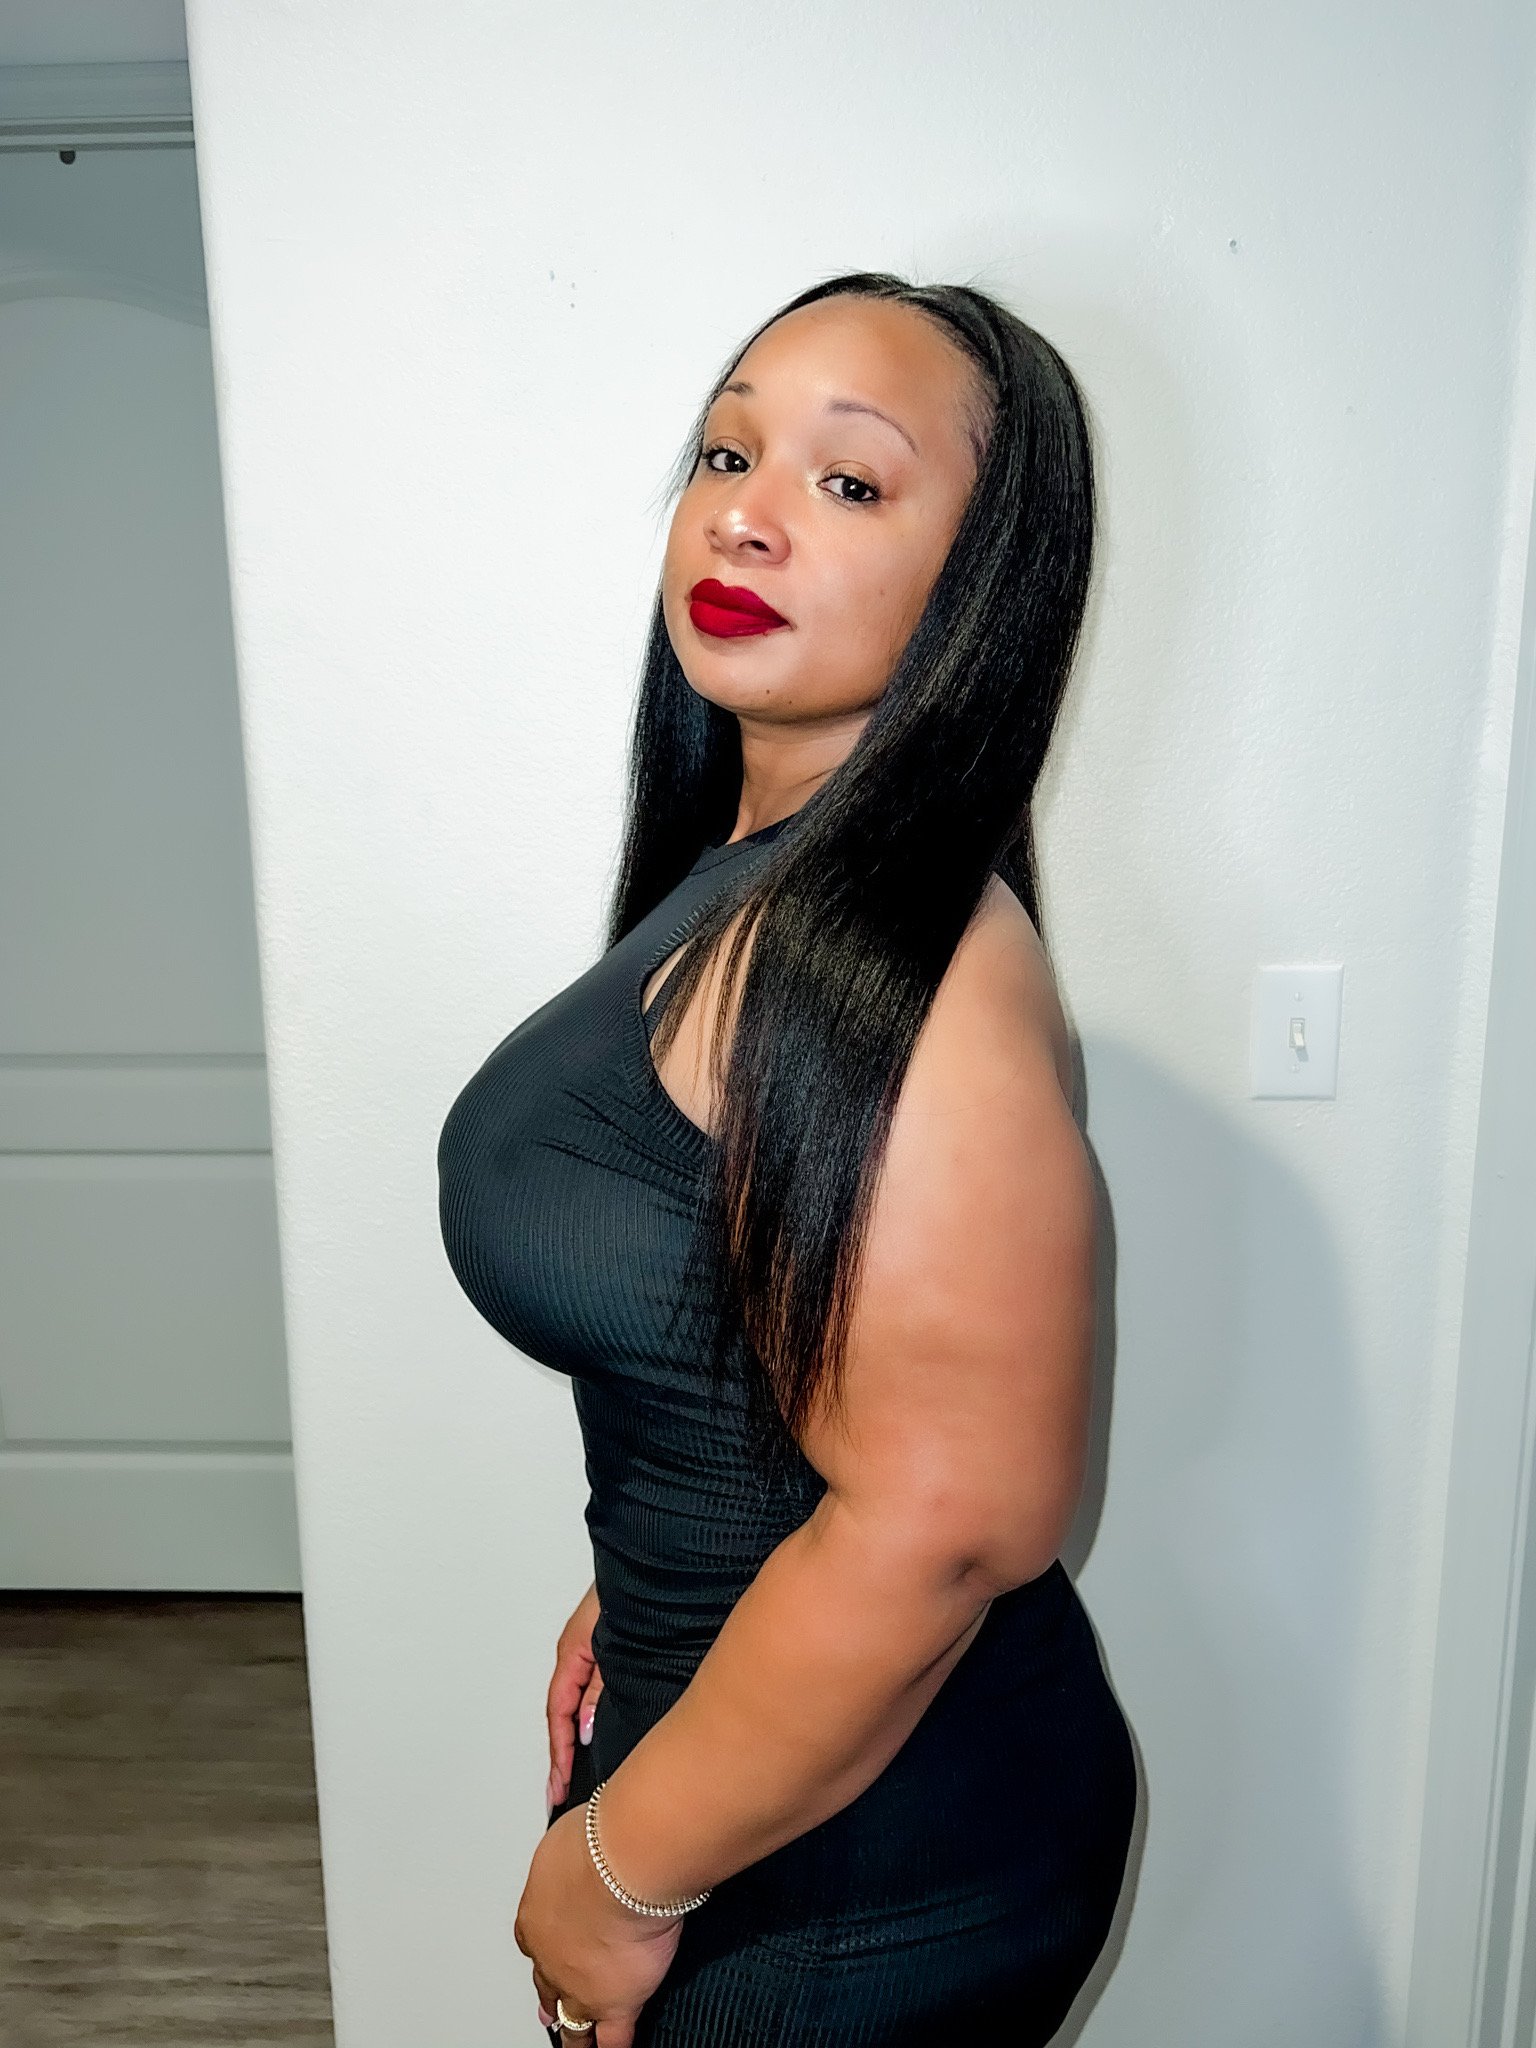


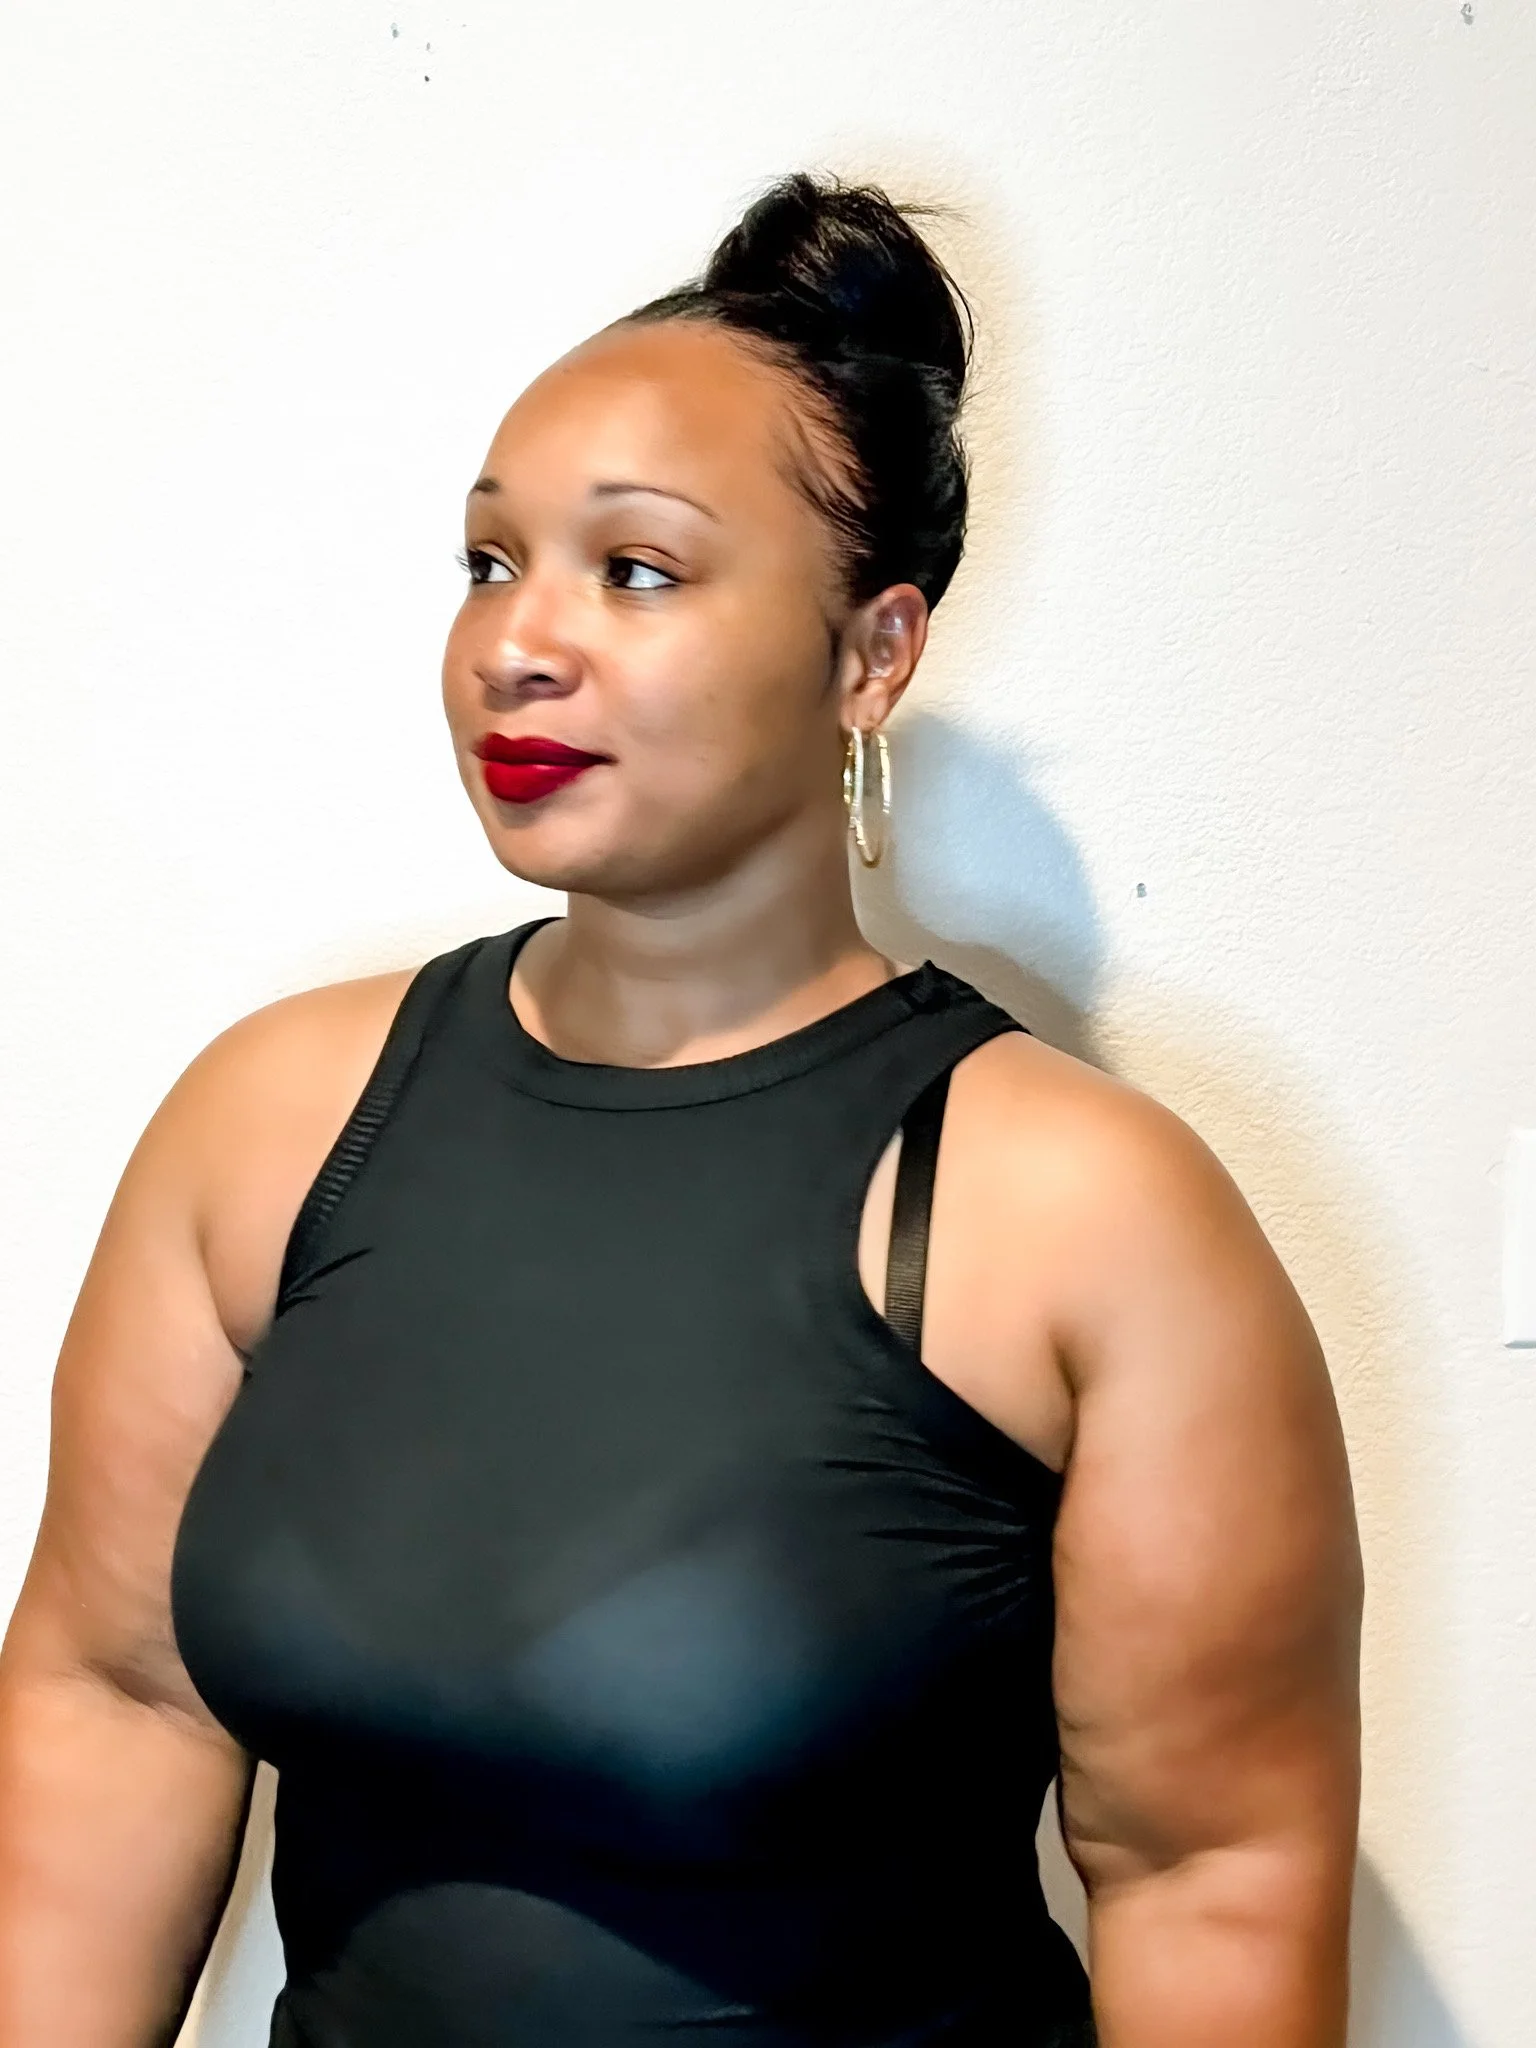


Stylist Care: wash as normal, however opt to only condition from mids to ends. The conditioner will loosen the silicone bead and cause the extensions to slip out over a few washes. So for lasting hair skip conditioner on the roots. Use either a detangling brush or denman brush to brush through hair or even a wide tooth comb.
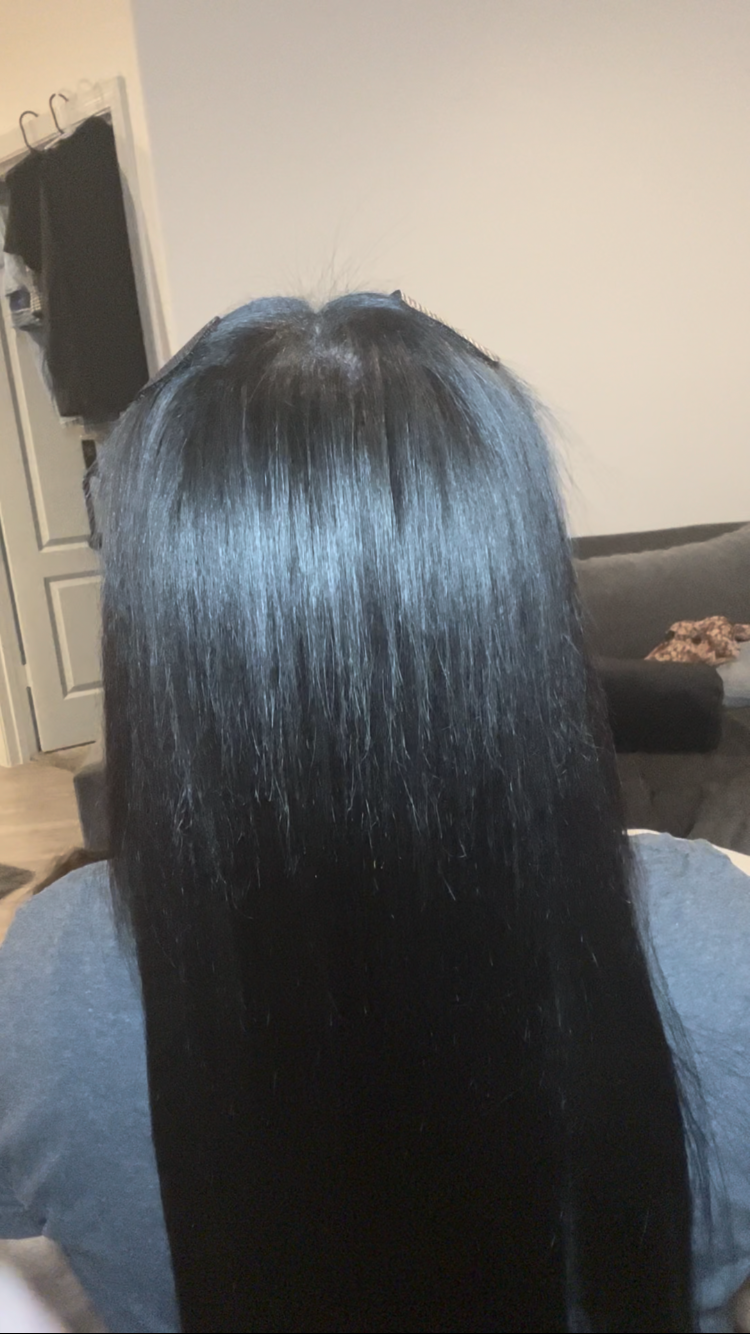
Added Tip: If you’re a person who develops a lot of dandruff or buildup dilute apple cider vinegar with water in a bottle with a nozzle and saturate your scalp only. Avoid getting directly on your hair as over time it can strip your colour. Massage into the scalp with the tips of your fingers then rinse, wash and rinse. Blow dry and style as usual. Based on these photos of my clients hair you can see this installation is very transitional.


MODEL BEHAVIOUR…Crimps are making a comeback!
On my recent trip to Los Angeles, I was called to set to style this beauty you see to the left of the screen. The look is simple, yet an ode to the past. For anyone who frequents Drybar this blowout style would be considered ‘The Straight Up’. It’s chic, has a bit of a bend and some volume to the hair for this transitional look.
What makes this style interesting was the designer requesting “crimps” in the models hair. Now for those of you who do not know the crimping hair tool was designed by stylist Geri Cusenza for legendary singer and actress Barbra Streisand in 1972 for her ‘Butterfly’ album.
Recently, celebrities from Janet Jackson, Lizzo and Kim Kardashian to Elizabeth Olsen have rocked the crimped hair look as an ode to the past.
Stylist Tips: On dry hair evenly coat a heat protecting mist or spray over hair and emulsify (brush/comb) through the hair before applying any heat. Using a rat-tail comb section the hair where you’d like to see your crimps and close the crimper lightly over hair then press harder and repeat down section of hair. Don’t shock the hair by hard-pressing too soon!
caramel creme brulée
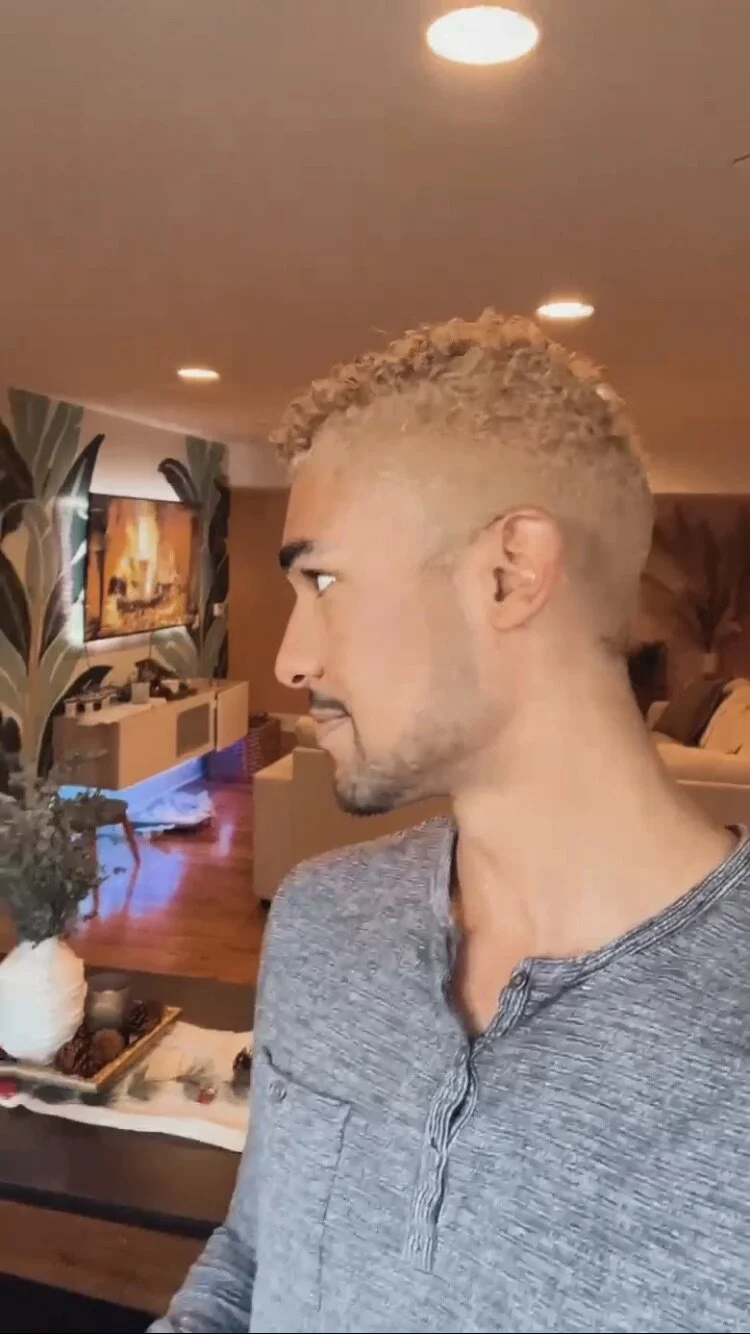
For several months now my client was back and forth on the decision to colour his hair. He wanted either silver or pink hair. Something different and with pop. The issue is he has never coloured his hair and had so many concerns? Would his curl pattern or hair texture be ruined? Would the choice of hair colour be appropriate for his professional job and what happens if he doesn’t love it?
In this scenario as a stylist you have to go at the pace of your clients comfort level. We can’t rush them or coax them into a decision that could ultimately leave them sobbing in a chair like an episode of ‘America’s Next Top Model’. Suggest other colours, something more in the natural colour spectrum- this level 7 blonde for example.
Stylist Tips: Primary Colour- 8G (light golden blonde) 30 grams & 7W (caramel) 15 grams with 20 vol developer to process. One can also use 10 or 15 developer as we are only depositing colour and not necessarily lifting and depositing or covering grey hair, which 20 vol would be great for.
So what did I do? I used 30 vol developer and 8 levels of lift powder with Olaplex to protect his natural curls. The closer to the scalp the lighter the hair will be due to the natural heat from the head. So if you want a more unified colour apply lightener to the roots last. I personally like to give an ombréd look as the hair grows out with the combination of washing + sunlight lifting the toner from the ends that originally picked up with most toner due to the ends of our hair being older and more porous.
I covered the head with foil and wet the inside of a plastic processing cap to draw more steam and covered the head. Then we sat on the balcony and ate lunch. 45 mins later the hair had lifted enough for toning. Now had we wanted silver or pink hair I would have left the lightener on longer and followed up with a second lifting session. Following the toner we just rinsed the hair in luke warm water and added a restorative keratin mask to sit for at least 30 minutes before rinsing in cool water to seal those cuticles. One tip I always give my colour clients is to PLEASE NOT WASH YOUR HAIR FOR 48 HOURS AFTER YOUR COLOUR!! Don’t sweat, don’t swim, don’t get wet! Think Reese Witherspoons perm interrogation from ‘Legally Blonde’.


bdsm & artistic hair colouring
This work was inspired by so many great hair artist before me and a collaboration with one of my great friends. My client Damian X Dragon is not only one of the leading gay adult film actors of today, but boasts over 16.5k IG followers showcasing his love for plants, bdsm and art. This show was by amazing photographer @GeorgeKanis for @Pornceptual magazine (magazine #4- Fuck 2020) and site.
The colour is simple, the concept is ART.
the perfect 1940’s waves
The perfect waves starts with a solid blow out. Now if you’re someone with naturally wavy or curly hair this look will hold well for you. But for my clients with naturally straight hair the blowout is pivotal.
Products: Leave-in-Conditioning Spray, Medium Hold/ Volumizing Mousse & of-course Heat Protector.
Stylist Tips: Rough dry the hair about 85% and then start at the parting. Part the hair where you want that dramatic effect. Personally, for this look a deep-side-part is my favourite! It screams glamour! Pin each section blown out to help the hair memorise the curl.
Once the blow dry is completed, remove the pin curls, spray with a dry heat protector and resection for ironwork. Using a 1” approx. 2.54 cm curling iron to curl the hair. Remember to get unified waves the hair has to all be curled in the same direction. So, either clockwise or counter-clockwise. If you mixed it up you’ll end up with a beach wave.
Once you’re done let the hair cool, light hold hair spray and take a paddle brush to gently brush out the curls into this wave. Take your duck-bill clips and pin in the indentation mark of the hair- respray with hair spray and let sit for another 10 mins if you can to cement the hair into place. Obviously, it’s not cemented! The hair will move girl, you just want to ensure that wave doesn’t drop before the end of the night Cinderella.


silver back hair!
One thing I wanted to make sure of in my work is diversification. When I moved to Paris in September of 2019 potential client on IG and Twitter were always asking if I could do ‘black’ hair, ‘white’ hair, ‘asian’ hair or ‘arabic’ hair. The answer is tout! I do all hair! Hair is complex, but when studied such an amazing thing to play with. I don’t think I could call myself a stylist if I couldn’t do hair. Now all styles such as braids or undo’s may be subject to stylist who particularly masters those techniques- me personally I prefer colour and extensions. Those are wear my passions reside. However, I believe I have a great foundation in everything from perms and relaxers, to colour, braids, extensions and stlying!
Stylist Tip: For level 1/2 hair colour you’ll definitely have to evenly process twice in order to get a perfect level 10. The trick is to always use your Olaplex or Brazilian Bond Builder to protect the clients hair texture and porosity. No one wants to leave with a cute IG picture, but hair feeling fried and damaged. Colour when done properly will not steal the shine or softness in ones hair.